If you're a flickr afficionado you've no doubt noticed an onslaught of artsy photos with intriguing borders cropping up all over the place. In case I am not the last person to figure out what TTV is all about I thought I would do a post about it. TTV is an acronym for Through The Viewfinder; a TTV shot is constructed by taking a picture with your digital camera through the viewfinder of any other camera. Sounds easy enough, however the real fancy TTV's require a digital SLR with a macro lens and a dual reflex camera. While I have access to a digital SLR, I do not own a macro lens and lack the requisite patience to build an apparatus which will allow the cameras to cohabitate. However, if that is up your alley check out Russ Morris' tutorial. Luckily, faux TTV's seem to be in vogue and they are ridiculously easy to achieve in Photoshop, here's how:
❷ Open up a photograph and a few of the textures you downloaded in Photoshop.
❸ Choose one texture to begin with. Select all of it (Ctl A), Copy it (Ctl C), and Paste it (Ctl V) on your photo. It will look wonky.
❹ In the Layers Palette click on the layer you just pasted and in the dropdown menu above it change the Layer Property from Normal to Multiply. Now it looks better.
❺ Now Transform (Ctl T) the texture to fit your photo. Hold down the shift key as you
make it bigger or smaller to keep its proportions intact. Then press the Enter key.
❻ Flatten the image (Layers>Flatten Image) and Crop away any excess.
❼ Try on different TTV textures to see what works best with your image.
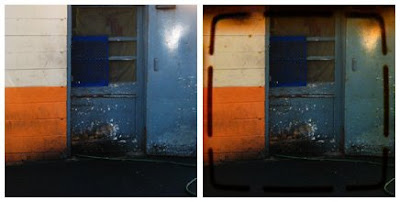
Before and After
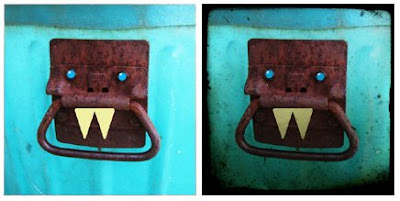
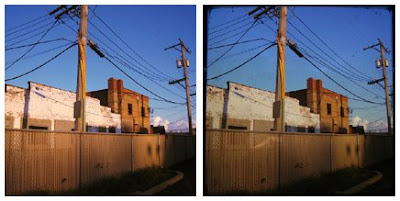
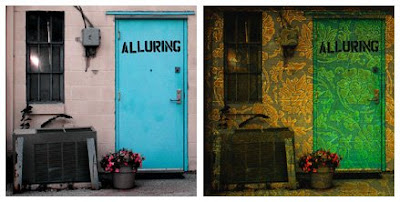
This last one is an example of how the tutorial can be used with any texture.
I'm going to pretend to organize my emphemera when really scouring for my own textures to use.
Happy playing and downloading! Wouldn't these be cool to print off and use in your journal! :)
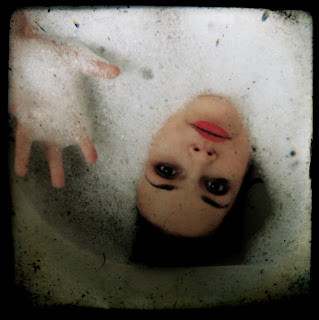
I can't wait to use this one.
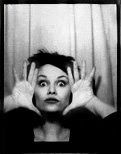
xo Lara